THE FASTEST TOOLS IN TOWN
ZIP APPLIANCE REPAIR & SERVICE
Phone: (559) 272-4265
Phone: (559) 272-4265
Appliance Repair Tips For Fresno, CA Residents

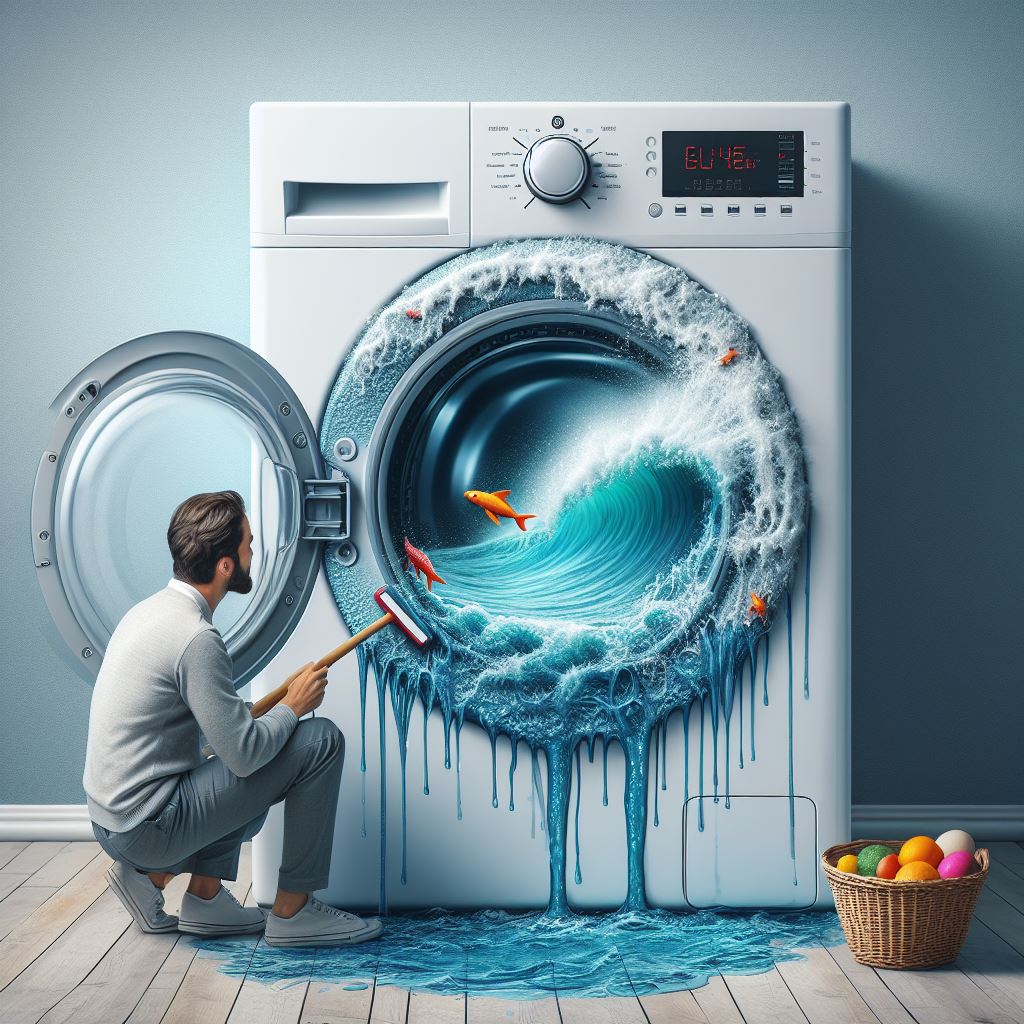
Stop the Flood: Fix Your LG Washing Machine Leak
“Taking proactive steps to fix your LG washing machine leak not only preserves your floors but also your peace of mind.” - Appliance Boss
Introduction:
Dealing with a leaking LG washing machine can be incredibly frustrating. You might wake up one morning to find a puddle of water on the laundry room floor, or perhaps notice subtle signs of moisture accumulating over time. From water pooling around the appliance to noticing dampness or stains on the floor, these issues can escalate quickly, leading to significant water damage if not addressed promptly. In this comprehensive guide, we'll delve into the common frustrations of dealing with a leaking LG washing machine and highlight the critical importance of addressing leaks promptly to prevent potential hazards and costly repairs.

Understanding the Problem
Recognizing Signs of a Leaking LG Washing Machine
The first step in tackling a leaking LG washing machine is recognizing the signs. One telltale sign is water pooling around the appliance after a wash cycle. This water accumulation might be subtle at first, but over time, it can become more noticeable and widespread. Additionally, if you find dampness or water stains on the floor near the washing machine, it's a clear indication that a leak is present and needs immediate attention.
Furthermore, paying attention to the sounds your washing machine makes during operation can provide valuable insights. Unusual sounds, such as grinding or sloshing noises, may indicate issues with the appliance's internal components, potentially contributing to leaks.
Explaining the Potential Causes of LG Washing Machine Leaks
Understanding the potential causes of LG washing machine leaks is essential for effective troubleshooting. One common culprit is a worn or damaged door seal. Over time, the door seal can degrade, leading to gaps that allow water to escape during the wash cycle. Similarly, loose or faulty hose connections can result in leaks, as can a clogged or damaged drain pump. Additionally, overfilled or unbalanced loads can put undue strain on the appliance, causing leaks to develop over time.
Tools and Materials Needed
Before embarking on any repair journey, it's crucial to gather the necessary tools and materials. You'll need a set of screwdrivers and pliers for removing panels and accessing internal components. In cases where the door seal or gasket is damaged, having a replacement on hand is essential. Likewise, hose clamps will be necessary for securing inlet and outlet hoses, while a drain pump filter cleaning tool will help remove debris from the filter. Finally, keeping towels or rags nearby will come in handy for cleaning up any spills or messes along the way.
Safety Precautions
Safety should always be a top priority when working with electrical appliances and water. Before starting any repair work, it's essential to unplug the washing machine from the power source to prevent the risk of electric shock. Additionally, avoid direct contact with electrical components when inspecting the appliance, and exercise caution when working around wet surfaces to prevent slips and falls.
Step-by-Step Repair Guide
Assessing the Leak
Once you've gathered your tools and materials and taken necessary safety precautions, it's time to assess the leak. Start by examining the location and severity of the leak. Is it a small drip or a steady stream of water? Does the leak occur consistently, or is it intermittent? Determining if the leak occurs during specific stages of the wash cycle can provide valuable clues as to its source.
Inspecting the Door Seal/Gasket
To access the door seal or gasket, you'll need to remove the front panel of the washing machine. Once exposed, thoroughly inspect the seal for signs of wear, tears, or mold growth. These issues can compromise the seal's integrity, allowing water to escape during the wash cycle. Depending on the extent of the damage, you may need to clean or replace the door seal/gasket to ensure a proper seal and prevent further leakage.
Checking Hose Connections
Next, inspect the inlet and outlet hoses for any signs of leaks or damage. Tighten any loose hose connections using a wrench or pliers and inspect the hoses for cracks or deterioration. If any hoses are damaged, they will need to be replaced to prevent water from escaping and causing leaks. Additionally, ensure that hose clamps are properly aligned and tightened to maintain a secure seal.
Clearing the Drain Pump Filter
A clogged or obstructed drain pump filter can impede water flow and contribute to leaks. Locate the drain pump filter access panel, typically located at the front or bottom of the washing machine. Remove the panel and carefully clear away any debris or obstructions from the filter. Use a brush or cloth to clean the filter thoroughly, ensuring that it is free from any buildup or blockages. Once cleaned, reinsert the filter securely, taking care to align it properly to prevent future leaks.
Balancing and Adjusting Loads
Properly balanced loads are essential for preventing leaks and maintaining the longevity of your washing machine. Overloading the machine with too many clothes or unevenly distributing the load can cause it to become unbalanced during the wash cycle, leading to excess vibration and potential leaks. When loading the machine, distribute the clothes evenly around the drum and avoid overfilling it to prevent strain on the appliance.
Testing the Repairs
After completing the necessary repairs, it's essential to test the washing machine to ensure that the leaks have been effectively resolved. Run a test wash cycle, paying close attention to the appliance's operation and monitoring for any signs of leakage. If the repairs have been successful, the washing machine should complete the cycle without any water escaping. However, if leaks persist, further inspection and troubleshooting may be necessary to identify and address the underlying issue.
Preventative Maintenance Tips
While addressing leaks is crucial, preventative maintenance can help prevent future issues from arising. Incorporating regular maintenance tasks into your routine can extend the lifespan of your washing machine and minimize the risk of leaks. Here are some preventative maintenance tips to consider:
Regularly clean the door seal or gasket and detergent dispenser to prevent mold and mildew buildup.
Check and clean drain hoses and filters periodically to ensure proper drainage and prevent clogs.
Use the appropriate amount of detergent according to the manufacturer's recommendations and avoid overloading the machine with clothes.
By following these preventative maintenance tips, you can keep your LG washing machine in optimal condition and reduce the likelihood of leaks occurring in the future.
Conclusion
In conclusion, addressing LG washing machine leaks promptly is crucial for preventing water damage and maintaining the longevity of your appliance. By recognizing the signs of a leak, understanding the potential causes, and following a step-by-step repair guide, you can effectively troubleshoot and resolve leaks as they arise. Additionally, practicing preventative maintenance and taking proactive steps to care for your washing machine can help minimize the risk of leaks occurring in the future.
At Zip Appliance Repair & Service, we're dedicated to helping homeowners like you keep their appliances running smoothly. Visit our website at fresno.ziprepairservice.com for more helpful tips and information on appliance maintenance and repair. If you're experiencing issues with your LG washing machine or any other appliance, don't hesitate to contact us at (559) 272-4265. Our team of experienced technicians is here to provide reliable and efficient repair services to get your appliances back up and running in no time. Don't let appliance problems disrupt your life – trust Zip Appliance Repair & Service to deliver quality repairs and exceptional customer service.

Stop the Flood: Fix Your LG Washing Machine Leak
“Taking proactive steps to fix your LG washing machine leak not only preserves your floors but also your peace of mind.” - Appliance Boss
Introduction:
Dealing with a leaking LG washing machine can be incredibly frustrating. You might wake up one morning to find a puddle of water on the laundry room floor, or perhaps notice subtle signs of moisture accumulating over time. From water pooling around the appliance to noticing dampness or stains on the floor, these issues can escalate quickly, leading to significant water damage if not addressed promptly. In this comprehensive guide, we'll delve into the common frustrations of dealing with a leaking LG washing machine and highlight the critical importance of addressing leaks promptly to prevent potential hazards and costly repairs.

Understanding the Problem
Recognizing Signs of a Leaking LG Washing Machine
The first step in tackling a leaking LG washing machine is recognizing the signs. One telltale sign is water pooling around the appliance after a wash cycle. This water accumulation might be subtle at first, but over time, it can become more noticeable and widespread. Additionally, if you find dampness or water stains on the floor near the washing machine, it's a clear indication that a leak is present and needs immediate attention.
Furthermore, paying attention to the sounds your washing machine makes during operation can provide valuable insights. Unusual sounds, such as grinding or sloshing noises, may indicate issues with the appliance's internal components, potentially contributing to leaks.
Explaining the Potential Causes of LG Washing Machine Leaks
Understanding the potential causes of LG washing machine leaks is essential for effective troubleshooting. One common culprit is a worn or damaged door seal. Over time, the door seal can degrade, leading to gaps that allow water to escape during the wash cycle. Similarly, loose or faulty hose connections can result in leaks, as can a clogged or damaged drain pump. Additionally, overfilled or unbalanced loads can put undue strain on the appliance, causing leaks to develop over time.
Tools and Materials Needed
Before embarking on any repair journey, it's crucial to gather the necessary tools and materials. You'll need a set of screwdrivers and pliers for removing panels and accessing internal components. In cases where the door seal or gasket is damaged, having a replacement on hand is essential. Likewise, hose clamps will be necessary for securing inlet and outlet hoses, while a drain pump filter cleaning tool will help remove debris from the filter. Finally, keeping towels or rags nearby will come in handy for cleaning up any spills or messes along the way.
Safety Precautions
Safety should always be a top priority when working with electrical appliances and water. Before starting any repair work, it's essential to unplug the washing machine from the power source to prevent the risk of electric shock. Additionally, avoid direct contact with electrical components when inspecting the appliance, and exercise caution when working around wet surfaces to prevent slips and falls.
Step-by-Step Repair Guide
Assessing the Leak
Once you've gathered your tools and materials and taken necessary safety precautions, it's time to assess the leak. Start by examining the location and severity of the leak. Is it a small drip or a steady stream of water? Does the leak occur consistently, or is it intermittent? Determining if the leak occurs during specific stages of the wash cycle can provide valuable clues as to its source.
Inspecting the Door Seal/Gasket
To access the door seal or gasket, you'll need to remove the front panel of the washing machine. Once exposed, thoroughly inspect the seal for signs of wear, tears, or mold growth. These issues can compromise the seal's integrity, allowing water to escape during the wash cycle. Depending on the extent of the damage, you may need to clean or replace the door seal/gasket to ensure a proper seal and prevent further leakage.
Checking Hose Connections
Next, inspect the inlet and outlet hoses for any signs of leaks or damage. Tighten any loose hose connections using a wrench or pliers and inspect the hoses for cracks or deterioration. If any hoses are damaged, they will need to be replaced to prevent water from escaping and causing leaks. Additionally, ensure that hose clamps are properly aligned and tightened to maintain a secure seal.
Clearing the Drain Pump Filter
A clogged or obstructed drain pump filter can impede water flow and contribute to leaks. Locate the drain pump filter access panel, typically located at the front or bottom of the washing machine. Remove the panel and carefully clear away any debris or obstructions from the filter. Use a brush or cloth to clean the filter thoroughly, ensuring that it is free from any buildup or blockages. Once cleaned, reinsert the filter securely, taking care to align it properly to prevent future leaks.
Balancing and Adjusting Loads
Properly balanced loads are essential for preventing leaks and maintaining the longevity of your washing machine. Overloading the machine with too many clothes or unevenly distributing the load can cause it to become unbalanced during the wash cycle, leading to excess vibration and potential leaks. When loading the machine, distribute the clothes evenly around the drum and avoid overfilling it to prevent strain on the appliance.
Testing the Repairs
After completing the necessary repairs, it's essential to test the washing machine to ensure that the leaks have been effectively resolved. Run a test wash cycle, paying close attention to the appliance's operation and monitoring for any signs of leakage. If the repairs have been successful, the washing machine should complete the cycle without any water escaping. However, if leaks persist, further inspection and troubleshooting may be necessary to identify and address the underlying issue.
Preventative Maintenance Tips
While addressing leaks is crucial, preventative maintenance can help prevent future issues from arising. Incorporating regular maintenance tasks into your routine can extend the lifespan of your washing machine and minimize the risk of leaks. Here are some preventative maintenance tips to consider:
Regularly clean the door seal or gasket and detergent dispenser to prevent mold and mildew buildup.
Check and clean drain hoses and filters periodically to ensure proper drainage and prevent clogs.
Use the appropriate amount of detergent according to the manufacturer's recommendations and avoid overloading the machine with clothes.
By following these preventative maintenance tips, you can keep your LG washing machine in optimal condition and reduce the likelihood of leaks occurring in the future.
Conclusion
In conclusion, addressing LG washing machine leaks promptly is crucial for preventing water damage and maintaining the longevity of your appliance. By recognizing the signs of a leak, understanding the potential causes, and following a step-by-step repair guide, you can effectively troubleshoot and resolve leaks as they arise. Additionally, practicing preventative maintenance and taking proactive steps to care for your washing machine can help minimize the risk of leaks occurring in the future.
At Zip Appliance Repair & Service, we're dedicated to helping homeowners like you keep their appliances running smoothly. Visit our website at fresno.ziprepairservice.com for more helpful tips and information on appliance maintenance and repair. If you're experiencing issues with your LG washing machine or any other appliance, don't hesitate to contact us at (559) 272-4265. Our team of experienced technicians is here to provide reliable and efficient repair services to get your appliances back up and running in no time. Don't let appliance problems disrupt your life – trust Zip Appliance Repair & Service to deliver quality repairs and exceptional customer service.
If your dryer has been giving you problems, contact Zip Appliance Repair & Service at (559) 272-4265

Appliance Repair In A Zip
If you need a dryer repair call our Team at (559) 272-4265, or visit our online scheduling page to request service.
Appliance Repair
HAVE A QUESTION, CALL (559) 272-4265

Online Offers
Take advantage of our online discount offers - save time and money...

Residential & Commercial appliances
See what our company can do for you

Appliance Repair Tips
If your appliance is not working properly...

1405 Commercial Way ste 100
Bakersfield, CA 93309
Lic # 1116346
Equipment We Sevice
- A Call To Confirm Your Appointment Time
- A Email Detailing Your Assigned Technician
- Information Needed Before The Repair Can Be Started
- An Estimate Of Work To Be Done
© 2025 ZIP APPLIANCE REPAIR & SERVICE LLC


